[ez-toc]
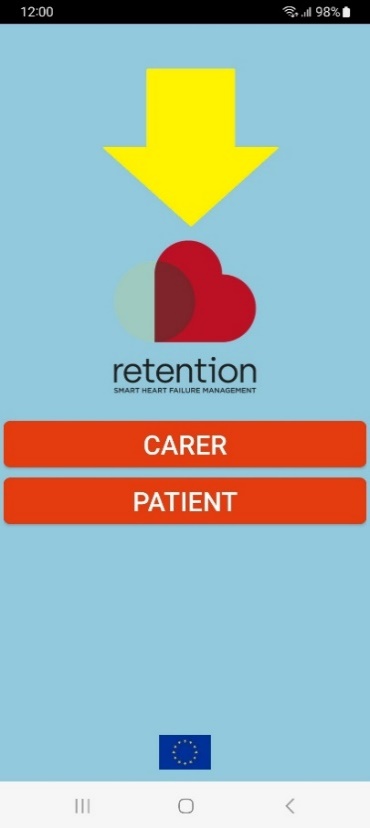
RETENTION MOBILE APP
USER MANUAL

1. Table of Contents
2. Introduction – about the RETENTION project
2.1. Study Pre-specified subgroup analyses include
2.2. Data points used by the study
3. Daily Measurement intervals for the application
3.1. Data collected by the application from smart sensors
and devices on a daily basis should be:
4. Sign in, Pair with devices and Measurements
4.1.2. Watch sync (measurements sync)
4.2.3. Oximeter syncing (taking a measurement)
4.3.2. Blood pressure measurement
4.3.3. Pressure gauge synching
4.5.1. Temperature measurement
4.5.2. Temperature input screen
Glossary
|
Pairing or pair: |
a procedure done once for each device, |
|
Synching or sync |
A procedure done on a continuous basis, |
Credits
|
GARMIN, GARMIN Venue SQ and We would like to thank |
|
OMRON, OMRON P300 Intelli We would like to thank |
USER MANUAL
2. Introduction – about the RETENTION
project
The primary goal of the RETENTION
project is to develop an integrated platform that gathers and analyses
health-related data flows, with further analysis of the day-by-day activities
of Heart Failure study participants in their home environment. Such continuous
data collection and processing will later provide the input for personalized
interventions that support the healthy and independent lives of the study
participants.
This collection will be performed by:
· Continuously monitoring
and collecting medical, clinical, physiological, behavioural, psychosocial, and
real-world data of patients.
· Analysing this data using
innovative model-driven big data analytics, statistical, artificial
intelligence and machine learning techniques.
· Detecting patterns in the
HF disease progress and the quality of life of patients.
· Cross checking and
validating them against clinical literature.
· Offering transparent,
explainable and verifiable decision-making capabilities that leverage the
evidence produced by the underlying data analysis.
This document is a user manual of the
RETENTION application, including a demo and how – to – use instructions. The application’s
main goal is to monitor (collect and present) a Cardiology patient’s
measurements while outside hospital care using standard, easily acquired
equipment. It should also be noted that RETENTION will abide by all principles
of GDPR including the principles of lawfulness, fairness and transparency,
purpose limitation and data minimization.
2.1. Study Pre-specified subgroup
analyses include
· The three patient categories:
o Heart Failure [HF],
o Left Ventricular Assist
Device [LVAD]
o and Heart Transplant [HT]
· Males and Females
· Patients with a hospitalization
less than three months from the enrolment
· Patients older than 60
years old
2.2. Data points used by the study
· Smartwatch (Heart rate,
Steps counter, Sleep analysis)
· Oximeter (Oxygen saturation)
· Pressure gauge (Blood
pressure) – excluding patients with LVAD
· Weight scales (Body
weight)
· Temperature (Manual entry)
· VAD (Manual entry)
The above devices send the collecting
data to a cell phone app via Bluetooth (BLE).
As an additional feature, a
questionnaire is embedded, giving doctors the ability to easily access patient symptoms.
This action should be completed at least once a week, on demand.
2.3. Extra Measurements -VAD
The following data will be
additionally collected for patients with VAD device installed:
· Controller parameters
· Alarms
· RPMs
· Power consumption
· Flow
· Pulsatility index
·
Driveline exit site evaluation (photographic evidence) as
early signs of infection
2.4. Devices – Equipment used
· Application edge (mobile
device)
o Samsung A13
·
Watch – Garmin
o Garmin Venue SQ
· Oximeter – OMRON
o Omron P300 Intelli IT
pulse oximeter
· Pressure gauge
o Omron M7 Intelli IT
· Weight scales -OMRON
o Omron HN 300T2 Intelli IT
2.5. Alternative devices
· Application edge (mobile
device)
o Samsung A02s or A03s
·
Watch – Garmin
o Garmin Venue SQ 2
· Pressure gauge
o Omron M4 Intelli IT
3. Daily Measurement intervals for the
application
3.1. Data collected by the application
from smart sensors and devices on a daily basis should be:
· Weight (once per day)
· Blood pressure (morning)–
excluding patients with LVAD
· Heart Rate (continuous by
wearing the Smartwatch) (synching once a day – morning)
· Peripheral capillary
oxygen saturation (morning, evening)
· Sleep: deep and light
sleep phases, sleep interruptions (via the watch)
· Steps, distance, floors
climbed, calories consumed (via the watch)
Warning
· Make sure you connect your phone/tablet to the internet at least
once every 2-3 days.
3.2. Timeframes
|
Parameter |
Registration / Randomization |
Month4 |
Month8 |
Month12 |
Month18 |
Daily |
Once a week / as needed |
|
RETENTION APPLICATION |
|||||||
|
Weight |
X |
|
|
|
|
X |
|
|
Body Temperature |
X |
|
|
|
|
X |
|
|
Blood Pressure |
X |
|
|
|
|
X |
|
|
Heart Rate |
X |
|
|
|
|
X |
|
|
Oxygen Saturation |
X |
|
|
|
|
X |
|
|
Sleep |
|
|
|
|
|
X |
|
|
Steps |
|
|
|
|
|
X |
|
|
Adherence to Medication |
|
|
|
|
|
X |
|
|
Symptoms |
X |
X |
X |
X |
X |
|
X |
|
VAD |
X |
X |
X |
X |
X |
X |
|
|
HOSPITAL |
|||||||
|
Clinical Examination |
X |
X |
X |
X |
X |
|
|
|
MNA Score |
|
X |
X |
X |
X |
|
|
|
HF – CQ v5 |
X |
|
|
|
X |
|
|
|
MOCA |
X |
|
|
|
|
|
|
|
PHQ9 |
X |
X |
X |
X |
X |
|
|
|
KCCQ |
X |
X |
X |
X |
X |
|
|
|
ECG |
X |
X |
X |
X |
X |
|
|
|
Blood Tests |
X |
X |
X |
X |
X |
|
|
|
6MWT |
X |
X |
X |
X |
X |
|
|
|
CPET |
X |
|
|
|
X |
|
|
|
ECHO |
X |
|
X |
|
X |
|
|
|
ICD |
X |
|
X |
|
X |
|
|
4. Sign in, Device Management and Measurements
·
To set up the application, the first sign in should be as an
admin. To access the admin login screen, tap the retention icon 7 times. The app will respond, counting down the
number of times for entry.
· Use the following
credentials to sign into the appropriate hospital Database or test environment:
|
Patient ID |
XXX {ex. 106} |
|
URL |
<Database selection> |
|
Language |
English or other available |
|
Admin Password |
{add a Password} |
· Tapping “Submit” will
return the user to the login screen and will allow them to log in either as a
carer or as a patient.
· Adding an admin password
is a must (will be provided by the IT support teams of the Hospitals).
· Tapping “Patient” or “Carer”
and using their biometrics will allow the user to log in.
· Users will have to accept
the privacy policy by tapping “OK”, then allow the application to use the
required parts of the device.
· Please accept all user
policies. The system does NOT keep or transmit any personal information.
4.1. Smartwatch
4.1.1. Watch pairing
· Tap the Watch icon. The
application will automatically scan for nearby pairable devices.

· Select the device from the list of the available devices.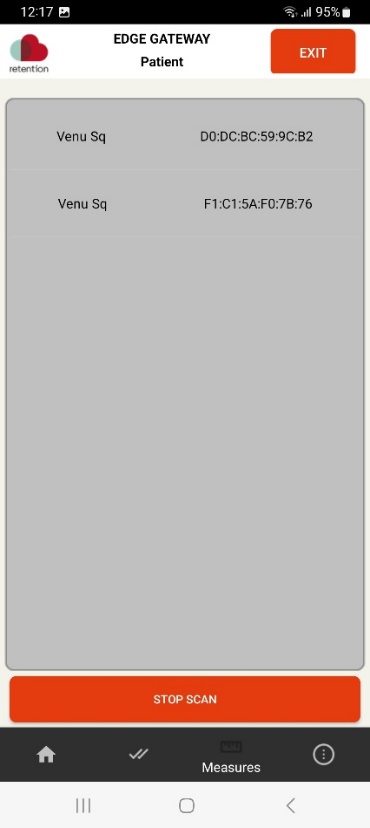
· Important: Fill in the required basic
demographic data as per the following screen: (gender, age, height, weight,
start sleep time, end sleep time). This is information pertinent to the profile
of the watch, used by the watch, set once and they are not transmitted.
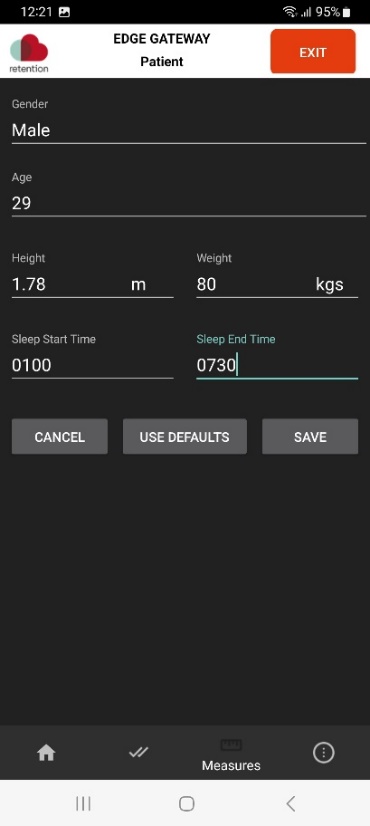
· Tap on save.
· Attention: A pin number will appear
on the watch screen while the “enter pin” screen will appear on the phone.
Enter the pin number on the application screen. If the pin was entered
correctly, the device will now be paired, and the application will return to
the “measures” screen.
· A prompt asking for
permission to use the watch will appear. Tap on “allow”.
4.1.2. Watch sync (measurements sync)
· Tap the ‘Measures’ icon
![]()
·
Select “Watch”
· The Watch will automatically
synchronize with the application.
· If the application seems
to be unresponsive, tap the “refresh” icon.
|
|
|
|


· Go back to the “Measures”
screen.
· Select “Charts”.

· The system will
automatically sync with the database.
·
Do this every day, at least 24 hours after your previous
sync time (e.g., if your previous sync was at 17:00, then your next
sync should be at or after 17:00).
Warnings
Ø RETENTION is NOT
compatible with the Garmin application. Do not install the Garmin
application.
Ø Keep the watch on your
wrist as much as possible, only taking it off for charging purposes.
Ø Keep your phone/tablet
close to the watch during the sync process. Make sure
you connect your phone/tablet to the internet at least once every 2-3 days.
4.1.3. Charts
After the watch is synchronized,
users can view the Sleep, Step and Heart rate graphs following these steps:
· Tap on the ‘Measures’ icon

· Tap on the ‘Charts’ option
· The user will be presented
with 3 charts: Steps, Sleep and Heart Rate.

·Steps will showcase steps taken for up to 24 hours, starting as soon as the watch is synced with the device.
·Heart rate will showcase heart rate for up to 24 hours, starting
as soon as the watch is synced with the device.
·Sleep will show the last sleep result entered, in detail.
·If need be, tapping the sync button will sync the application
to the watch again.
4.1.4. Activity
The ‘Activity’ option showcases
the number of steps taken, distance travelled and calories spent by the
patient:
·
Tap on ‘Measures’ icon
![]()
·
Select ‘Activity’.

· The application will automatically
synchronize to the database immediately. In case of an issue, a warning will
appear, notifying the user that sync has failed and they will have to do it
manually, using the button at the bottom of the screen.

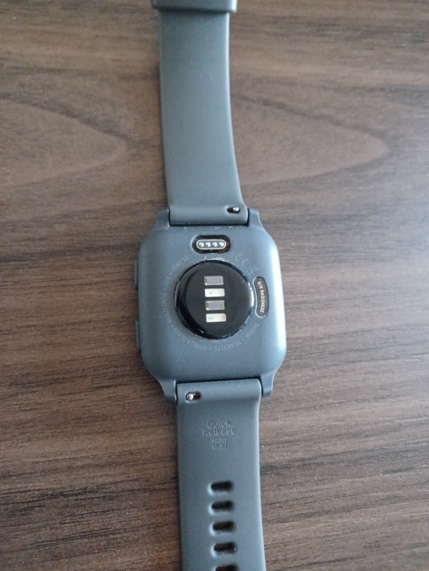
4.1.5.
Watch charging
·
Plug the charger to the back of
the watch.
·
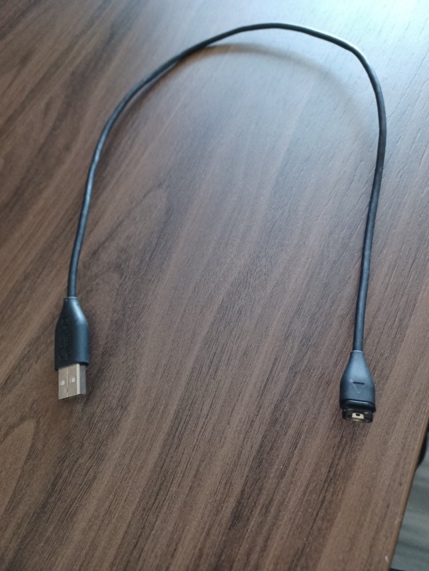
Connect the charger to a USB
port on your PC/laptop or an adapter that is plugged in to a power socket.
|
|
|
4.2. Oximeter
4.2.1.
Oximeter
Pairing
· Tap the ‘Oxygen level’
icon

· A pop-up will appear.
Follow the instructions on it to pair with the device and then tap the “I did
it” button.
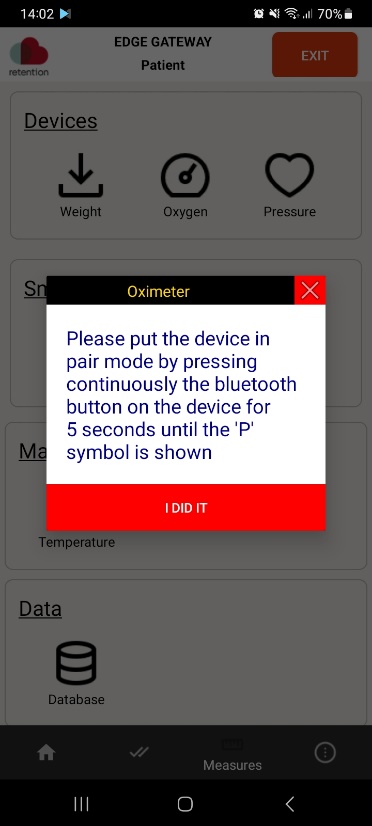
· A second pop-up will
appear, giving the option of syncing with the device.
4.2.2. Oximeter measurement
·
Press the power button to turn on the oximeter.
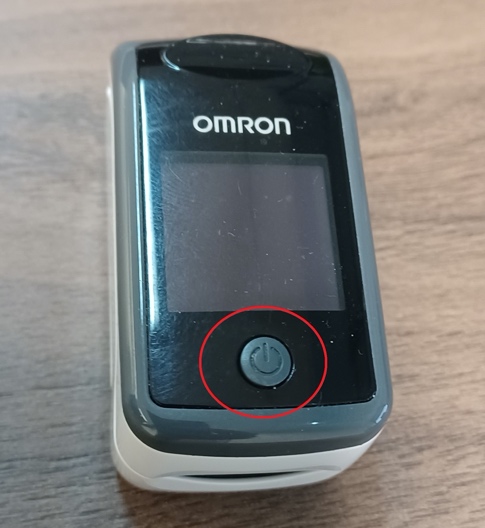
·
Open the device by pressuring the top and back.
·
Place the device on your finger. 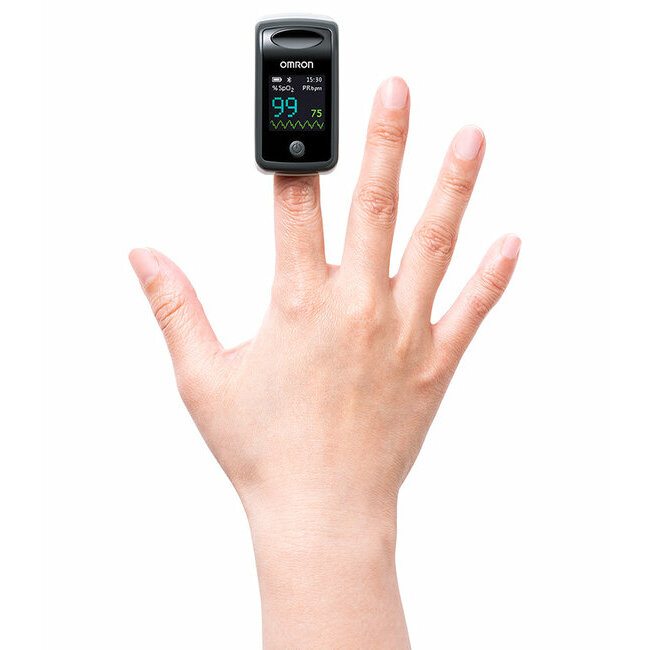
·
Remain still during the measurement.
Warnings
Ø It’s preferable to bleach your nails if they are dyed.
Ø The oximeter should be applied to warm fingers, not cold or frozen
ones.
Ø Avoid sunlight or other lights as they may affect the measurement.
Ø Keep your phone/tablet close to the device during the measurement. Make sure you connect your phone/tablet to the internet at least
once every 2-3 days.
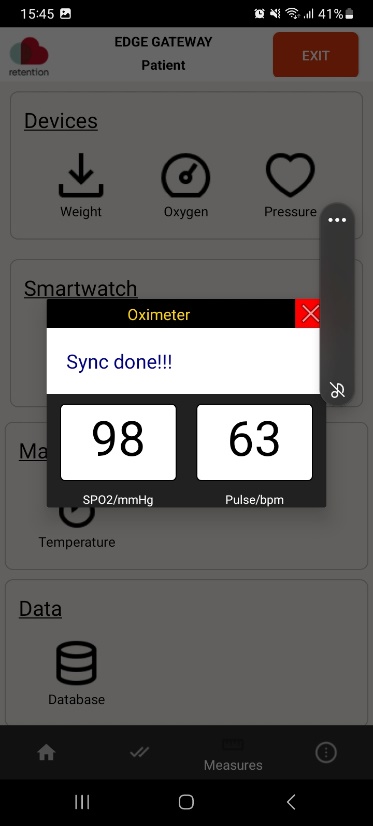
4.2.3. Oximeter syncing
·
After taking the measurement, tap the “Sync” button.
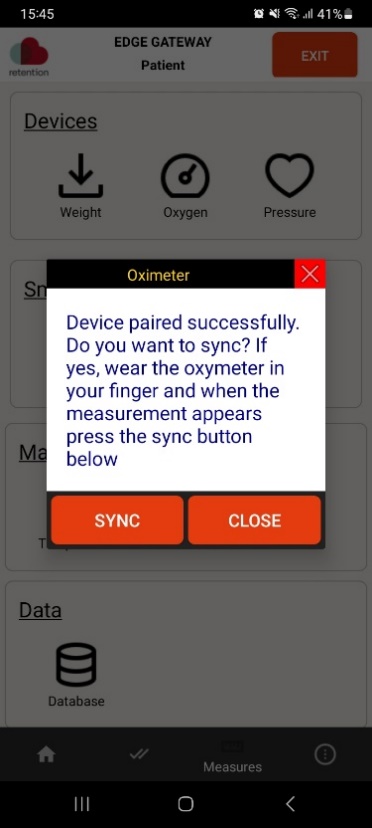
·
As soon as synchronization is complete, a third pop-up will
show the results.
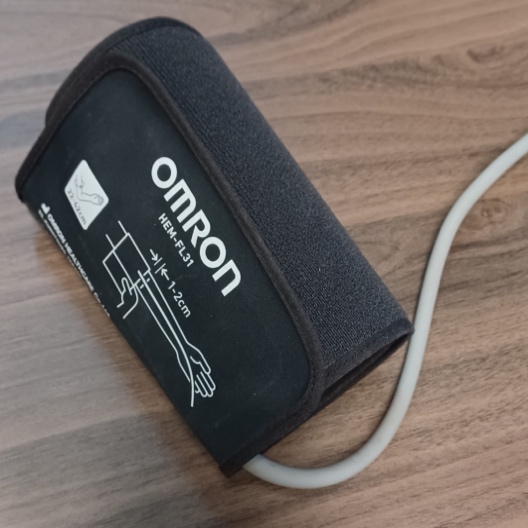
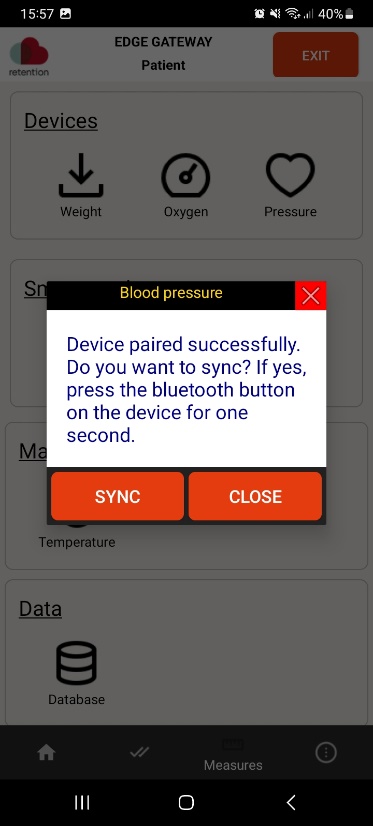
4.3. Pressure gauge
4.3.1.
Pressure
gauge pairing
· Tap the ‘Blood Pressure’
icon

· A pop-up will appear.
Follow the instructions on it to pair with the device and then tap the “I did
it” button.

· A second pop-up will
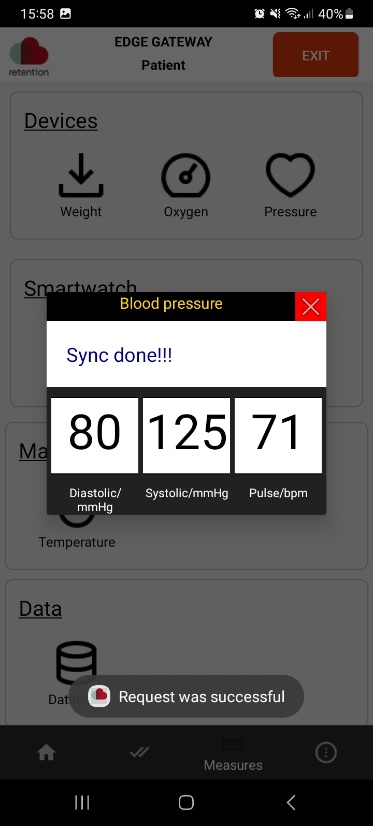
appear, giving the option of syncing with the device.
4.3.2. Blood pressure measurement
·
Place and fix the cuff on your left or right arm. It should
be approximately at heart level, just above the elbow.
·
Tighten the tape.
·
It is recommended that you are seated with your back
supported by your seat during the measurement.
·
Press the ON / OFF button to start inflating the cuff.
·
There will be an indication of your systolic / diastolic pressure
and pulse
·
Remove the cuff
Warnings
Ø The pressure should be taken after at least 5 – 10 minutes of rest and
relaxation.
Ø DO NOT change the patient (bottom left switch). This is not supported
by the application at the moment.
Ø You should be fasting and have no coffee for one hour before the
measurement. Additionally, smoking may affect the measurement.
Ø If you have been exercising, allow at least 2 hours before measuring.
Ø Make sure the environment where the measurement is taken is quiet and
pleasant in terms of temperature.
Ø Your arm should be relaxed and resting.
Ø Your legs should not be crossed, and you should not talk during the
measurement.
Ø Do not wear tight clothing, especially tight sleeves on the arm where
you will be taking the measurement.
Ø The size of the air chamber of the cuff plays a role in the accuracy
of your measurements.
Ø
When you first
start measuring your blood pressure, the measurement should be taken on both
arms. If you find a difference of up to 1.5 millimetres
of mercury between the two hands, don’t worry. It is a common phenomenon. If
there is a bigger difference, inform your physician. For subsequent
measurements, use the arm that measures higher.
Ø Keep your phone/tablet close to the device during the measurement.
Ø Make sure you connect your phone/tablet to the internet at least
once every 2-3 days.
4.3.3. Pressure gauge synching
· After taking the
measurement, tap the “Sync” button.
· As soon as synchronization
is complete, a third pop-up will show the results.
4.4. Scale
4.4.1.
Scale
Pairing
· Tap the ‘Weight’ icon

· A pop-up will appear.
Follow the instructions on it to pair with the device and then tap the “I did
it” button.
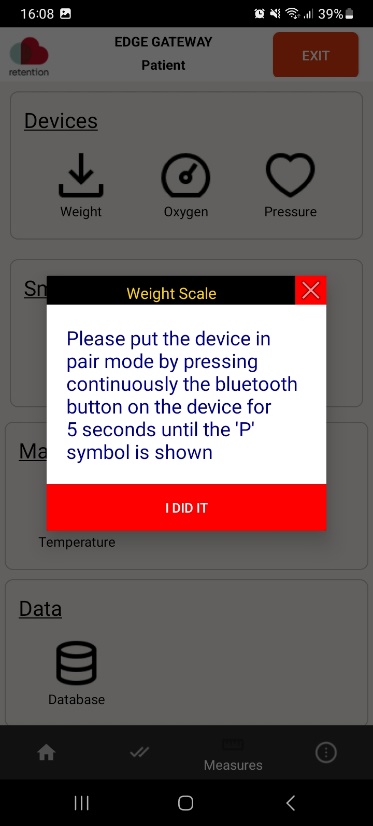
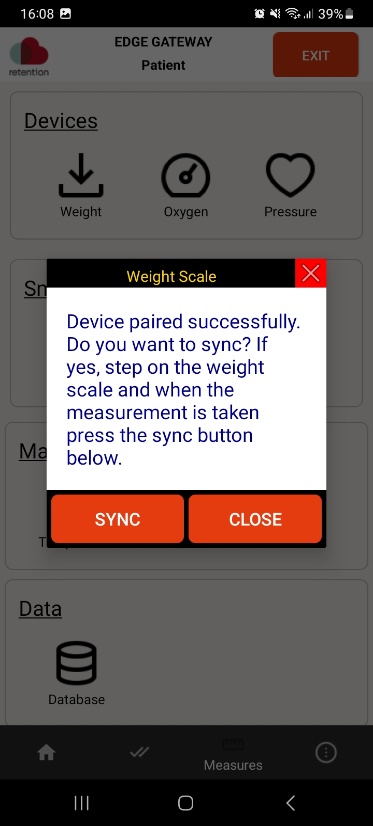
· A second pop-up will
appear, giving the option of syncing with the device.
4.4.2. Weight measurement
·
Step on the scale.
·
Wait until the result appears.
·
Step off the scale.
Warnings
Ø It is best to weigh yourself as soon as you wake up, before you drink
water or eat something and after using the toilet.
Ø Don’t weigh yourself at night, as fluid retention, eating meals or
even fatigue can result in a measurement of up to two kilos more.
Ø Don’t weigh yourself after a workout.
Ø Weigh yourself without clothes on and always on the same scale.
Ø Always ensure that your scale is resting on the floor.
Ø Keep your phone/tablet close to the device during the measurement.
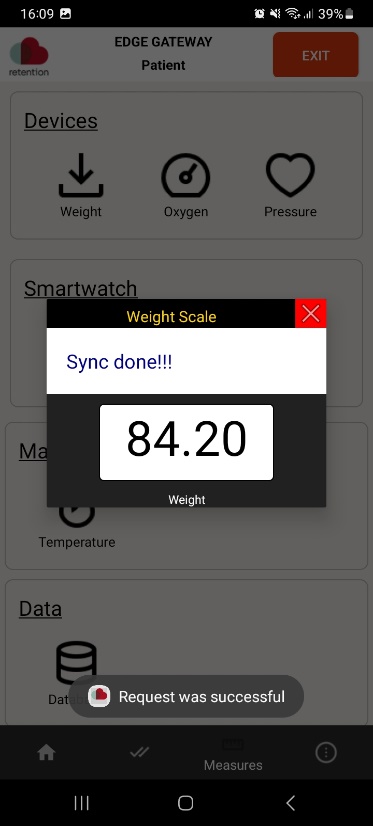
4.4.3. Weight scale Synching
·
After taking the measurement, tap the “Sync” button.
·
As soon as synchronization is complete, a third pop-up will
show the results.
4.5. Thermometer
4.5.1. Temperature measurement
· Place the thermometer and
wait until the allotted time passes (according to the device instructions).
· View the result.
Warnings
Ø Wait at least 1 hour after intense exercise/hot baths before taking
your body temperature.
Ø Wait 20 to 30 minutes after smoking, eating or having a drink (hot or
cold).
4.5.2.
Temperature
input screen
· Tap the ‘Measures’ icon
![]()
·
Tap ‘Temperature’

·
Manually input the value
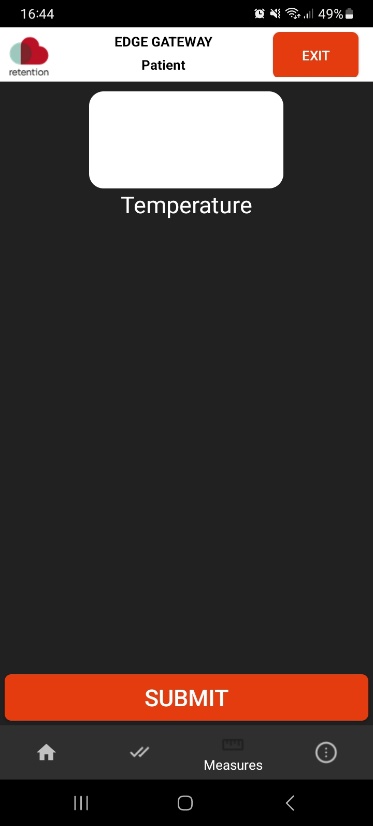
·
Tap “Submit”.
4.6. Simple Device Maintenance
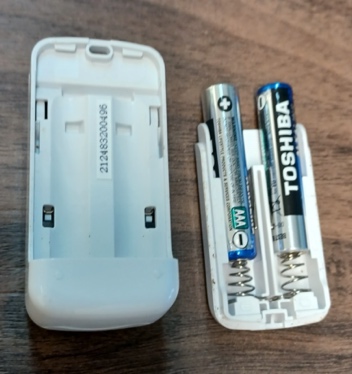
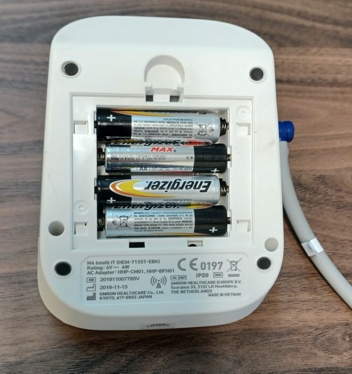
4.6.1.
Changing batteries
·
Remove the cover at the back of
the device.
·
Remove the old batteries.
·
Insert the new ones, according
to the directional signs.
·
Re-attach the cover.
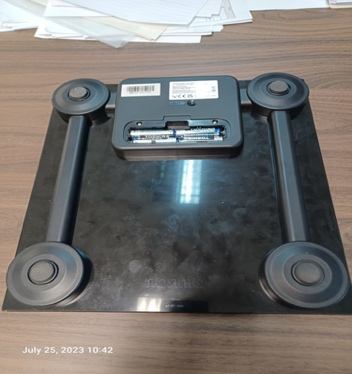
View of the backs of the measurement
devices, with the covers removed:
|
Oximeter |
Pressure gauge |
Scale |
|
|
|
|
5. Other functions
5.1. Adherence to
Medication
It is imperative to take your medication. For RETENTION to monitor
the adherence to medication, the following screen keeps the score. In this way
patients and doctors can view their adherence to medication from the Medication
screen.
·
Tap the Medication icon
![]()
·
A list of medication the user
is currently on will appear on the screen.
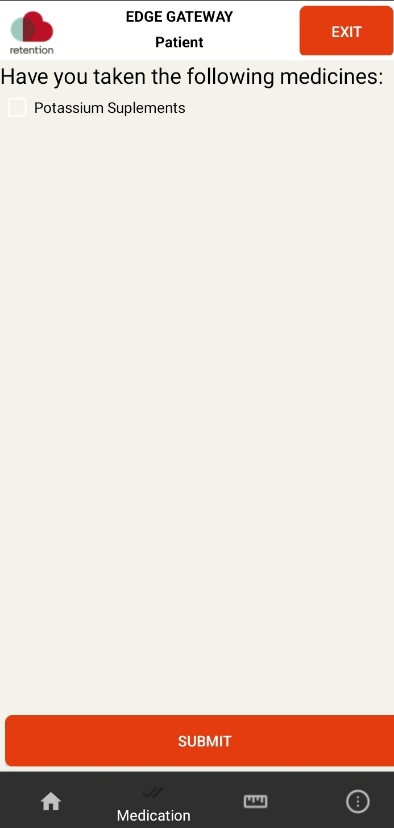
·
Tap the checkmark next to the
names of the medication you want to mark as taken and then press the “Submit”
button.
·
After submitting, the system
will not allow the user to submit again until the next day.
Note:
this is a daily procedure for the patient of carer.
5.2. Questionnaire
The RETENTION application contains a Questionnaire module, which
asks the user a set of simple questions regarding their condition.
·
Tap the ‘Others’ icon
![]()
![]()
· Tap the ‘Questionnaire’ icon
![]()
· A list of questions will
follow
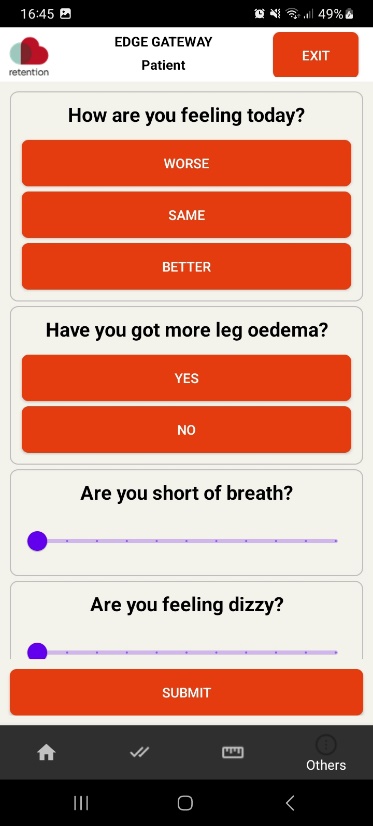
· After answering the
questionnaire, tap on ‘Submit’.
Note: this is
a weekly procedure. BUT the patient or carer can do this more often, if they
feel the need to do it.
5.3. Database
The patient or
carer can check (but NOT modify) previous measurements sent to the system.
· Tap the ‘Measures’ icon
![]()
·
Tap ‘Database’
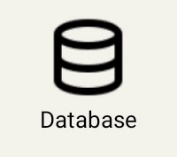
·
This screen will display a history of the user’s past
measurements, broken down into the following categories:
i.
Diastolic blood pressure
ii.
Systolic blood pressure
iii.
Pulse
iv.
Oxygen levels
v.
Temperature levels
vi.
Weight
vii.
Calories
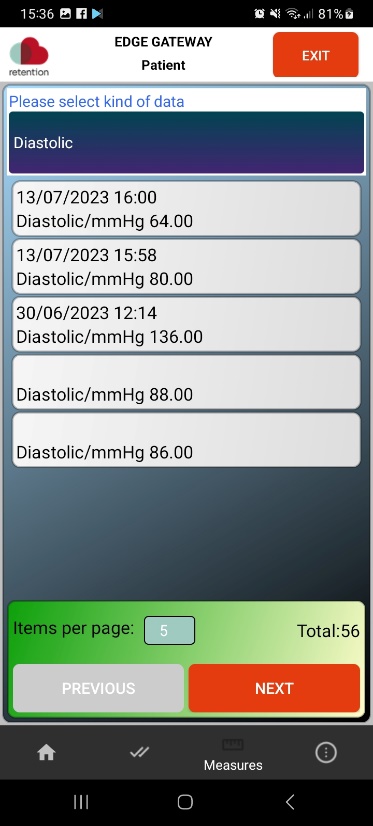
·
Tapping the purple frame at the top will cause a dropdown to
appear, allowing the user to change the measurement displayed.
·
To change the number
of measurements displayed, tap the number next to the “Items per page” text at
the bottom. Users can choose to display up to 100 items per page.
·
Tap the “Previous” and “Next” buttons to move between pages.
Consortium


This RETENTION-Project has received funding from the European Union’s Horizon 2020 research and innovation programme under Grant Agreement No. 965343.


Coordination
Contact
Dimitris Koutsouris
Project Coordinator
Info@retention-project.eu
Tel. +30 210 772 3893
Fax +30 210 772 2431